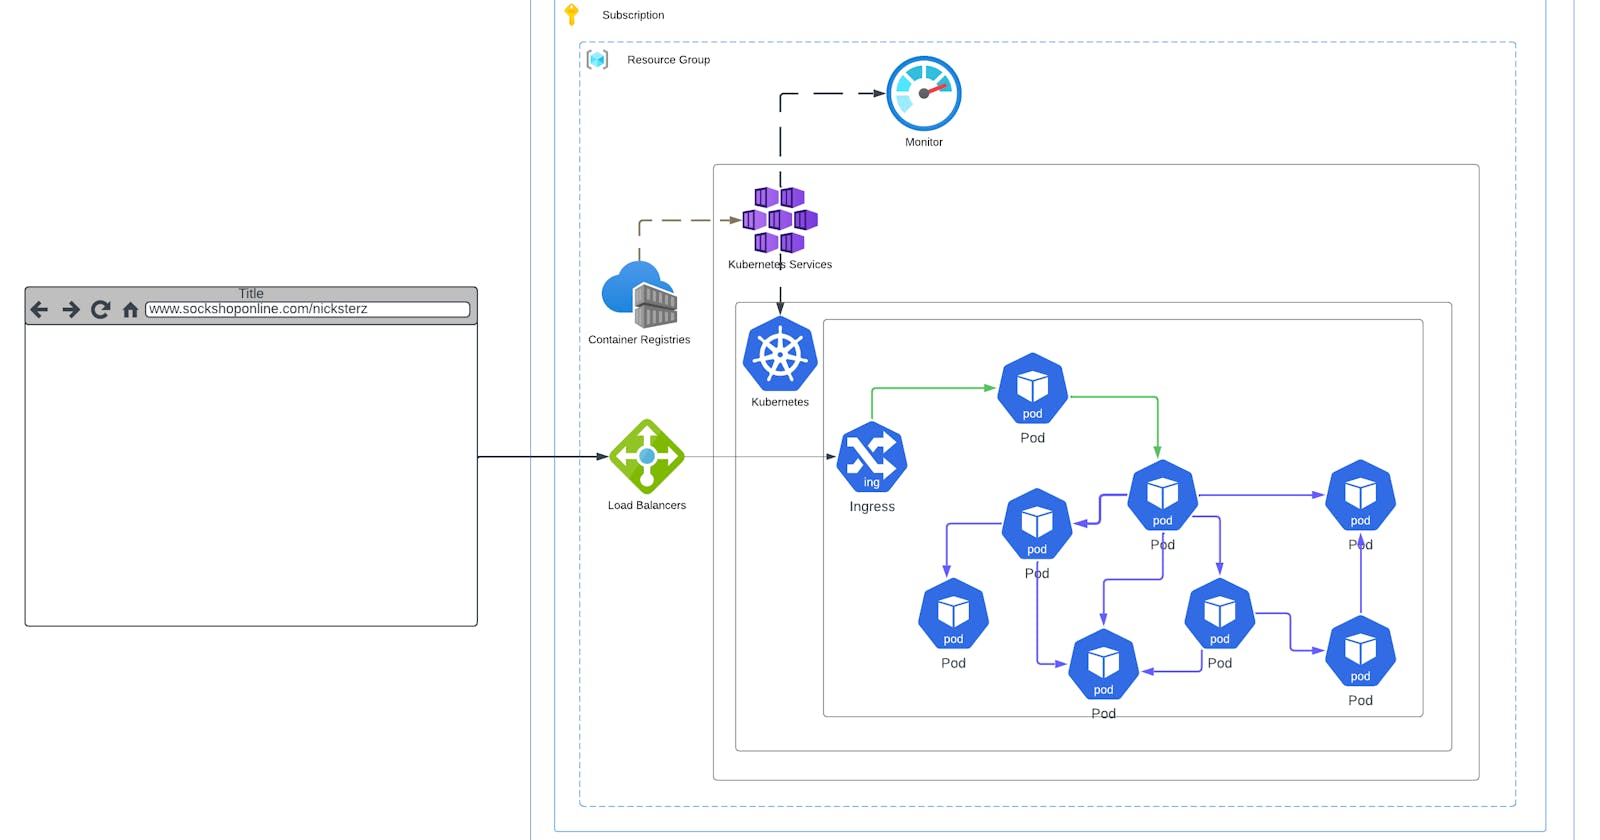
Azure Kubernetes Service (AKS) is a managed Kubernetes service provided by Microsoft Azure for deploying, managing, and scaling containerized applications using Kubernetes. AKS abstracts the underlying infrastructure complexities, allowing developers and cloud teams to focus on deploying and managing their applications without worrying about the operational overhead of managing Kubernetes clusters.
Azure Kubernetes Service (AKS) empowers developers and DevOps teams to build, deploy, and manage containerized applications with Kubernetes in a fully managed and scalable environment, leveraging the rich capabilities of the Azure cloud platform.
With out any further ado,lets get to setting up an Azure kubernetes cluster on Azure.
TL:DR
As a more experienced engineer said to me to use the power of the Azure CLI to swiftly deploy infrastructure. Below is a simple command for creating an Azure Kubernetes Service (AKS) cluster:
az aks create --resource-group <resource-group-name> --name <cluster-name> --node-count <node-count> --node-vm-size <vm-size> --location <location> --generate-ssh-keys
This command initiates the creation of an AKS cluster named <cluster-name> with the specified number of nodes, VM size, and location within the <resource-group-name>. It also generates SSH keys for secure access. Adjust parameters as needed for your deployment.
Via the Azure portal
Login in to your azure portal and in the search bar, search for kubernetes and select the service, it should look a bit like this

Click on create and then click "create a Kubernetes cluster" as shown in the image below

From here we fill in the prompts, we will create a new resource group here in the resource group section and do remember that aks will create another resource group for its resources to live in.
Give your cluster a unique cluster name and set the desired region, i'm using UK South as its much closer, together with 2 availability zones for high-availability, the rest can be set to the default values and then click next

For the node pools, think of the node pools as the actual virtual machines that will be hosting our kubernetes application, we are going to add another node pool and update the agent pool to 1-3 nodes and the worker also 1-3 nodes.
select "add node pool"

Here are the specifications we are going to use for the worker node pools, give it a name and then set the rest as follows:
Mode = user
OS Sku = Ubuntu linux
Availability zones = zones 1 and 2
Node size = Standard_B2s (needs to be at-least 2 Vcpu)
Scale Method = Autoscaling
Minimum node = 1
Maximum node = 2
The remaining values can be left as default values, unless you have any other given specifications or requirement

click add and then we should have 2 pools, with 1-3 nodes accessible on each pool,

Great, we have our pools, now we need them to able to communicate with each other, in the networking tab we are going to set the network policy to use calico and kubnet for the network configuration

As for Monitoring, we will be using the default monitoring solution provided by azure monitor, which give us insights into metrics like cpu usage,memory,and overall health and performance

Later we will install the Helm-prom stack which will provide us with prometheus and grafana for our own personally customized monitoring solution.
For now lets move to the advance tab and ensure the infrastructure group name is fine and then click "review+create"

Now patiently wait about 4-5mins for it to create a cluster as it takes a few minutes to create, meanwhile ensure your have the Azcli installed and also kubectl install on your host machine

Great, we have our aks cluster set up and ready to go, click on connect and then we can see instructions on how to connect to our cluster

Copy the command and open your terminal, first sign in using the az login command and then use the az aks get-credentials command and import your cluster credentials

Great, we have created and connected to our cluster and we can use our kubectl commands to interact with our cluster
In A future article, we will talk about deploying an application to our Kubernetes cluster.
🚧🚧🚧Don't forget to delete all your resources when you are done!🚧🚧🚧
